As expected, the metal moths have been feasting on the chassis of my VW. This is one of several holes in the rear chassis rails. They always get bigger as you clean them back:-
This is after cleaning back with a flap wheel in a grinder, then spraying with weldable primer.
I couldn't figure out how to make a suitable template so decided to repair the damage in two goes (bearing in mind I have never welded a vehicle before). This is the first plate:-
Reasonably happy with the result. Theres plenty more to do, by which time I should be a competent welder.
Sunday, 19 October 2014
Tuesday, 30 September 2014
TT
So I haven't used my 1913 Ariel TT model since I went to Ireland with Huw. Looking back that's six years ago! So its time for the old girl to come out of hibernation now she's 101 years old.
I've had the bike since 2004 after I bought it off an Ariel Club mate who had found it in Trowbridge (of all places). It had sat in an old mill for decades before the previous owner, on finding out the mill was due for demolition, saved it. It had its last tax disc still on the bike - 1924. So it had been used from 1913 to 1924 then laid up til Mick bought it. Mick fixed it up but never rode it much so I bought it off him, got it fettled and road worthy and enjoyed a good few years blatting around the countryside including a trip to Ireland and France. Then, in a `several pints of Guinness' haze, I managed to melt it on the road to Rosslare while charging along with Huw. I fixed it but its not been run since.
So, pre-flight checks went well, wheel bearings and spokes all seem good, greased the forks etc., but I couldn't stop a petrol leak from the tank. It looked like it was the tap but several fibre washers later it became clear that there was a hairline crack in a previous solder repair (from the 1920's, not a recent one). When I got the bike I had to solder up the petrol tank as it was leaking all over the place. This was quite an experience but I managed to do it successfully, so fixing a hairline crack should be straight forward. Probably...
Dug out my paraffin blowtorch and smaller soldering iron:-
The paraffin blowtorch is great - you have to pump some pressure into the reservoir while warming the evaporation tubes in the nozzle with a gas torch. Eventually it bursts into life but generally not before emitting a stream of burning paraffin in a nice arc.
I cleaned off the repair point and gave it a wash with Bakers Fluid to try to get it as clean as possible, then added some solder melting it into and onto the crack.
It takes a bit of heating to get the soldering iron to a hot enough temperature to melt the solder. The colder tank robs the heat fairly quickly.
After a bit of dressing and replacing the taps I put some white spirit in the tank to see if it was still leaking:-
So far so good. I'll let it dry out first then try it with petrol before I'm happy I've sorted it but it looks promising.
Wednesday, 17 September 2014
Oil Leaks
All old vehicles have oil leaks - mine more than most. But generally I don't mind that on the bikes but the Dub is dropping on the drive and it needs sorting. So while I have the drive shaft off I might as well try to change the gearbox oil seal that is weeping.
So, I removed the centre cap and circlip from the gearbox outlet shaft and the drive flange should just come off. But it didn't. So some light persuasion with a chisel and some Moleys got it off eventually.
Revealing the offending seal:-
Gotta pull it out and replace but that for next time.
So, I removed the centre cap and circlip from the gearbox outlet shaft and the drive flange should just come off. But it didn't. So some light persuasion with a chisel and some Moleys got it off eventually.
Revealing the offending seal:-
Gotta pull it out and replace but that for next time.
Friday, 12 September 2014
DoomRamp
Double blog alert!!
Not used the miniramp in ages so thought I'd drive over to the other side of Swindon and have a roll.
To be honest, I don't do the ramp justice. I can roll around and drop in and that's about it. But as I have absolutely no frontside kickturn, I thought I could use it to learn. So I rolled back and forwards, and threw in the occasional FS attempt. And they are starting to emerge, all be it slowly.
More doomramping needed I think.
Back in the Dub
Thought I'd better get cracking with the dub works again after the summer holidays and other stuff got in the way.
Sorting the bearings on the last rear quarter, including changing the CV joint boots and hopefully stopping a gearbox oil leak.
Fitting a new ball bearing - this one went in easy:-
Then the roller bearing on the other side - which was a right bastard to fit. Had to get the big blowtorch out for this one:-
Changed the CV joint boots too and regreased - the first one done:-
And both done and bagged up:-
Just throwing some stone chip onto the hub carrier:-
Loads more still to do, then its welding time. Uh oh.
Sunday, 6 July 2014
Hairy Holes
For a change I decided to do some work on the bikes today. I have an early 1950s Ariel VH 500 which I bought a fair few years ago in a proper state. It was cheap tho. Since then its had various parts loosely attached to it, mainly to try to get a V5C for the bike with the original registration, which was successful.
I was thinking about part ex-ing it with a mate who is building another Ariel, but common sense went out of the window and I've decided to get busy and do it myself.
This is how it looked at the start - not Selly Oaks finest. Its actually a 500cc single engine in a twin frame, hence the odd looking engine plates (odd if you know Ariels anyway...)
And after an afternoon of spannering:-
Its now all in boxes - the trick is to get on with it and not leave it in boxes for the next five years. Glad I bought an air impact gun - made removing those seized and tricky nuts a doddle.
What I have in mind for it is something like this:-
Gonna be tele forks not girders but I reckon I have the makings of a pretty nice bobber in my garage. And when I get bored with that I can convert it back to standard.
Some of the other residents of my garage were wheeled out into the sun so I had space to work.
1938 Ariel 500 Red Hunter in the foreground. Its still got the 1950s VB stealth tank on it which I fitted `temporarily' while I painted the original panel tank, which of course I haven't finished yet. To be honest I quite like it like that. 1954 Velocette in the background.
My first Ariel, bought in 1996 or 97. A 1928 Model D - 500cc OHV engine, 3 speed Burman gearbox, hand change, total loss oiling system. Gonna be nice if I ever finish it (the engine is fairly complete but I haven't done anything to it for a while).
I was thinking about part ex-ing it with a mate who is building another Ariel, but common sense went out of the window and I've decided to get busy and do it myself.
And after an afternoon of spannering:-
And finally:-
What I have in mind for it is something like this:-
Gonna be tele forks not girders but I reckon I have the makings of a pretty nice bobber in my garage. And when I get bored with that I can convert it back to standard.
Some of the other residents of my garage were wheeled out into the sun so I had space to work.
1938 Ariel 500 Red Hunter in the foreground. Its still got the 1950s VB stealth tank on it which I fitted `temporarily' while I painted the original panel tank, which of course I haven't finished yet. To be honest I quite like it like that. 1954 Velocette in the background.
My first Ariel, bought in 1996 or 97. A 1928 Model D - 500cc OHV engine, 3 speed Burman gearbox, hand change, total loss oiling system. Gonna be nice if I ever finish it (the engine is fairly complete but I haven't done anything to it for a while).
Thursday, 3 July 2014
Things
Been busy again.
Went up to Teesside to see my Mother. Had a day out in York while we were there. Ain't been to York for 30-odd years.
The wimmin went into the Minster:-
But I couldn't be arsed with that so I had tea and cake here:-
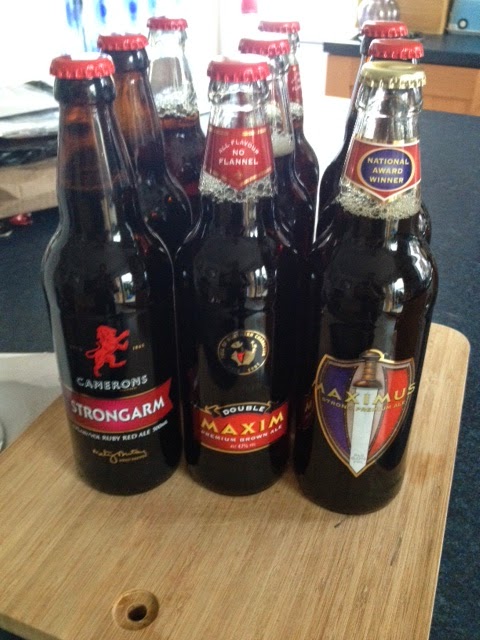
Along with rebooting my Northerness I also restocked in brown beer while I was there:-
Fun and games continues with the VW. The shagged rear wheel bearings I found turned out to be fine, but I had them out and washed and regreased ready for reassembly:-
Of course I snapped a brakeline taking it all apart so I made a new one:-
The other inhabitants of my garage:-
Went up to Teesside to see my Mother. Had a day out in York while we were there. Ain't been to York for 30-odd years.
The wimmin went into the Minster:-
But I couldn't be arsed with that so I had tea and cake here:-
Then I went for a walk through one of the gated streets:-
And bought this in a funky record shop I found:-
On the Sunday we went to Seaham to see a new monument to the survivors of WW1. Its an all welded Tommy and while it don't look too big from the road, its a good 12-15ft high when you get up close and theres some great detail:-
Along with rebooting my Northerness I also restocked in brown beer while I was there:-
Fun and games continues with the VW. The shagged rear wheel bearings I found turned out to be fine, but I had them out and washed and regreased ready for reassembly:-
Of course I snapped a brakeline taking it all apart so I made a new one:-
The other inhabitants of my garage:-
Subscribe to:
Posts (Atom)